How to define who is allowed to use the /check-user commands
The commands /check-user and /check-account, as well as the Check User function, are by default only visible/usable by users with the Manage Roles permission on your Discord server. You must override these settings if you need users without this permission to use these commands.
This guide shows you how to do so.
Following these steps, you can also hide other Aleeva commands from users entirely or in specific channels.
To get started, you have to go into your Discord server settings. These can be found by clicking on your servers name and than select Server Settings.
In the Server Settings, head to Integrations (1). On the integration screen, click on Aleeva (2).


On the Aleeva Integration screen, you can see a short description of Aleeva, Command Permissions, and Permissions Aleeva has, as well as all Webhooks managed by Aleeva.
The first two boxes (Roles & Members and Channels) handle the overall usage of Aleeva Commands on your server.
The third box allows for specific command permissions. The three commands we want to configure are: “Check User“ (1), /check-account (2) and /check-user (3). In this example, we will only show you the steps for “Check User“. You can just repeat these steps for other commands.
To start, you have to click on “Check User“ (1).
A new screen will pop up which shows the name of the command at the top. As these commands have defaults, Discord will inform you about them. If you click on “View“ you can also see which permissions a users needs to be able to use this command by default.

We want to change this so that, in our case, developers and verified supporter can use this command. We add these two roles in the “Role & Member Overrides.”
This screen also allows us to define where this command can be used. After you configure everything, remember to hit save.

This was it already. After these changes, every user allowed to use the commands will see them in the commands list and have the option to use the “Check User“ function on users.
How to add an API Key to my account?
Learn how you can add an api key to your account.
If you want to use all features which Aleeva has to offer or the server you joined wants you to add an api token, here is how you do this. As the api token is assigned to your discord account, you have to do this just once and it will work with every server which uses Aleeva.
Here is a step by step guide for adding an api token to your account:
- Use the command
/api-key add - Click on the button Add new Api Key or Add new Light Api Key
- Open https://account.arena.net/applications and create a new key
- Past the key into the dialog Aleeva shows you
- If your key is valid and has all needed permission you should see a confirmation
Step 1: Add a new api key
- Use the command
/api-key addin any channel you like.

Click on the button Add new Api Key or Add new Light Api Key
Now you have to create a new api key for Guild Wars 2. You can do this here: https://account.arena.net/applications. Please make sure that you select all the needed permissions during creation of your key because you will not be able to change them later. The api key should have at least the following permissions:
account,builds,characters,inventories,wallet,progressionandunlocks. If you opt for a light api key, you api key needs at least theaccountpermission.

- You can copy the api token with the icon shown in the image

- Now past the key in the dialog Aleeva shows you. She will then verify it.
- If everything is perfect, Aleeva will send you this confirmation.

Step 3. You're done!
That’s it! Now you have successfully added an api key to your Aleeva account. From now on you can use all commands which require a key. Also if you are on a server on which Aleeva managers roles and/or names, you will now get the roles/name which match the conditions of your key.
Troubleshooting
Why does Aleeva need all these permissions?
Aleeva requires this set of permissions (account, builds, characters, inventories, wallet, progression and unlocks) because it allows all Aleeva commands to be usable.
If you only want to get verified on a server and do not intend to use Aleeva, you can opt for a light key, which only requires the permission account.
The full key ensures that all of Aleeva's features are available, so the bot works without issue.
The reasons why specific permissions are needed:
Account - Used for account verification with Aleeva
Builds - Allows YOU to use Aleeva functions related to builds (such as traits in PvE,PvP and WvW as well as equipment loadouts and masteries)
Characters - Allows YOU use Aleeva commands relates to specific characters (such as listing your character birthdays)
Inventories - Allows YOU to use Aleeva to search for specific items in your character inventories (e.g !!li or !!ufe command)
Wallet - Allows YOU to search for items in your in-game wallet (such as a particular map currency or festival currency, this does not relate to real world financial information about your account)
Progression - Allows YOU to use Aleeva features to query related to progress (such as what raid bosses have I killed/what achievements am I missing)
Unlocks - Allows YOU to query Aleeva about things you have unlocked in the game (such as mount skins, dyes, minis etc)
Guilds - ONLY needed by guild leaders to check the rank of members in the guild (to map roles in-game to roles in Discord)
If we allowed the users to pick and choose the API permission by themselves, it would end up that they would need to change the API token permissions multiple times to be able to use all of Aleeva's commands and features. This is not what we want for our user's experience with Aleeva. Also this would result in problems like why does one feature work and not another and so on. In addition to this the API tokens are saved globally for the user, to allow it to work across all Discord servers that the user has access to (that use Aleeva) no matter what features of Aleeva the server's use. The pvp permission is the only optional permission because we only have one pvp command so far.
How to add an Arcdps Update Notification
Keeping track of updates for arcdps, a popular mod for Guild Wars 2, is essential for many players. With Aleeva, a versatile Discord bot, you can easily set up an update notification for arcdps. Follow the simple steps below to never miss an important update again.
Keeping track of updates for arcdps, is essential for many players. With Aleeva, a versatile Discord app, you can easily set up an update notification for arcdps. Follow the simple steps below to never miss an important update again.

1. Access the Settings
To add an arcdps update notification, you need administrator permissions, be the owner, or have a role with "Aleeva Administrator" permissions. Once you meet the requirements, use the /settings command.

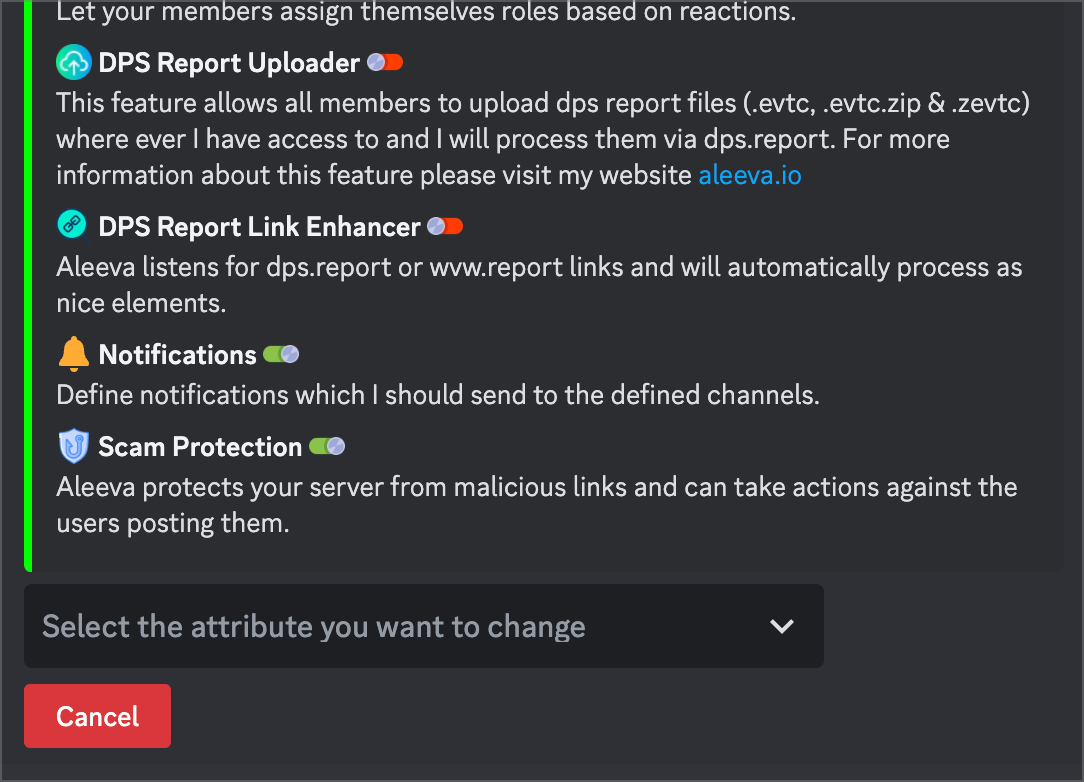
2. Navigate to Notifications
Within the settings, locate the dropdown menu and select the "Notifications" option.
If you encounter an error message from Aleeva stating that it is missing the "Manage Webhooks" permissions, you'll need to assign this permission to the Aleeva role. This can be done in the server settings of your Discord server.
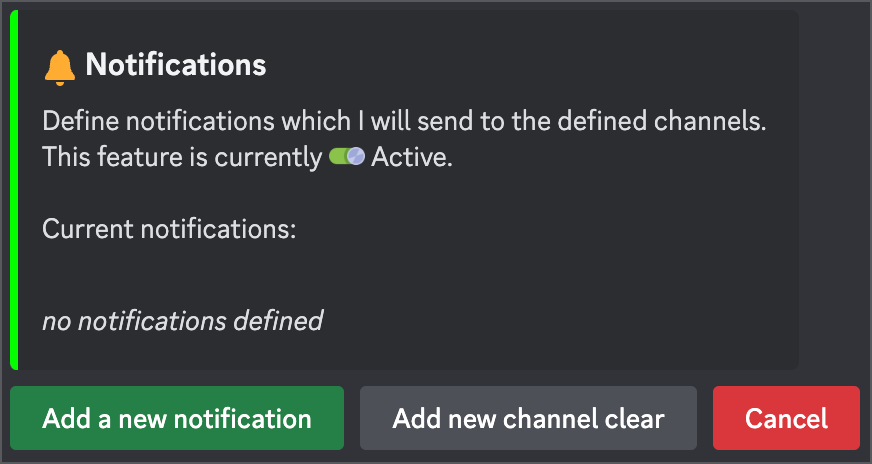
3. Activate Notification
If the arcdps update notification is inactive, click the "Activate" button. If it's already active, you can skip this step.

4. Configure the Notification
After activation, click on the "Configure" button to proceed.

5. Add a New Notification
Locate the "Add a New Notification" button inside the configuration panel and click on it.
6. Select the Channel
Respond with the number corresponding to the channel you want to use for the arcdps update notification. Please note that only channels where you and Aleeva have read and write permissions will be visible.

7. Choose "arcdps Release"
From the dropdown menu, select "arcdps Release" as the type of notification you wish to create.


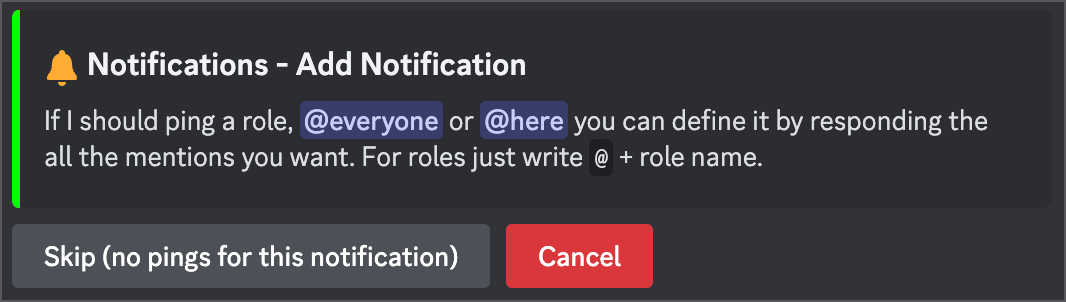
8. Optional: Assign Roles to Ping
You can skip this step or answer with the roles Aleeva should ping whenever there is an arcdps update. Roles must start with the `@` symbol.
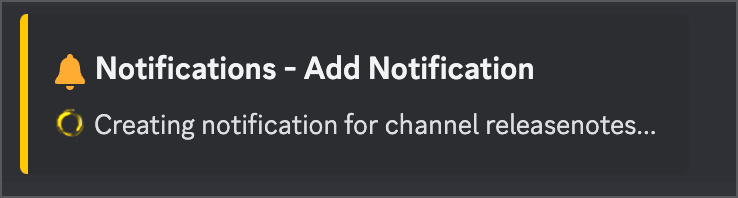
9. Notification Creation
Aleeva will now create the arcdps update notification based on your selections. After the process is complete, you will be redirected to the screen where you can add more notifications.

10. Verification
At this stage, you should see the newly created arcdps release notification listed under your selected channel. This indicates that the notification setup was successful.
Following these simple steps, you can quickly receive timely notifications about arcdps updates, ensuring you stay up-to-date with the latest improvements and bug fixes. Enjoy your enhanced gaming experience with Aleeva!

Getting started with Aleeva [Video - Old]
Short tutorial by Rheyo about how to setup and use Aleeva.
Short tutorial by Rheyo about how to setup and use Aleeva.
How to connect PlenBot Log Uploader to Aleeva
Learn how you can link PlenBot to your Aleeva Profile.
To connect Plenbot to Aleeva, you need to generate an Aleeva Api Token and add it to PlenBot.
Here is a step by step guide for adding an api token to your account:
- Open a private conversation with Aleeva
- Use the command
/profile - React with the ⚙️ emoji to open the account settings
- React with the 🔒 emoji to manage your Aleeva Api Access
- React with the
 emoji to create new access code
 - React with
 to get an access code for PlenBot
 - Copy the access code and past it into PlenBot
Step 1: Open Aleeva account settings and Aleeva Api Access
- Use the command
/profilein a private conversation with Aleeva

- React with the ⚙️ emoji to open the account settings

- Answer with number 10 to manage your Aleeva Api Access
Step 2: Create a new access code for PlenBot

- React with the emoji to create new access code.

- Now you can react with to get an access code for PlenBot. There is also the possibility to compose your own set of permissions but as PlenBot is supported by Aleeva it is easier to use the predefined one

- You can then copy the access code provided by Aleeva (see image above)
Step 3: Add access code to PlenBot
- Open PlenBot and click on the Aleeva Integration button in the right bottom corner


- Past the access code from above into the text field and click on Authorise.

- If everything worked, you should now see the message Status: Aleeva successfully authorised
Step 4. You're done!
That’s it! You successfully linked PlenBot to Aleeva. From now on all reports which are uploaded by PlenBot are also sent to Aleeva.
Step 5. Permissions
With PlenBot you have to option, that Aleeva posts the reports directly to a channel of your choice. If you are not the owner of a server, you need to have a role linked to the Aleeva permission: Report Uploader, which allows you to do this. In addition to this, make sure that Aleeva has write and embed permissions for this server and channel, as well as that you self have read and write permission too.